Sparco seats are one of those modifications that change the entire relationship between you and a project car. You sit lower, your hips stay planted, and the steering wheel finally feels like it belongs in your hands. That improvement is real, but bolting in a shell is not the whole job. Seat type, bracket geometry, harness routing, head clearance, airbag wiring, and street legality all matter. The right setup should make the car more controlled without creating a new safety problem.
For a garage-built car, start with the actual use case. A weekend autocross car has different needs from a street-driven E36, track-prepped BRZ, or long-distance turbo Subaru. Write down the chassis, driver height, approximate weight, daily mileage, helmet use, and whether the factory airbags must remain functional. That list will narrow the options quickly.
Choosing the right Sparco seat style
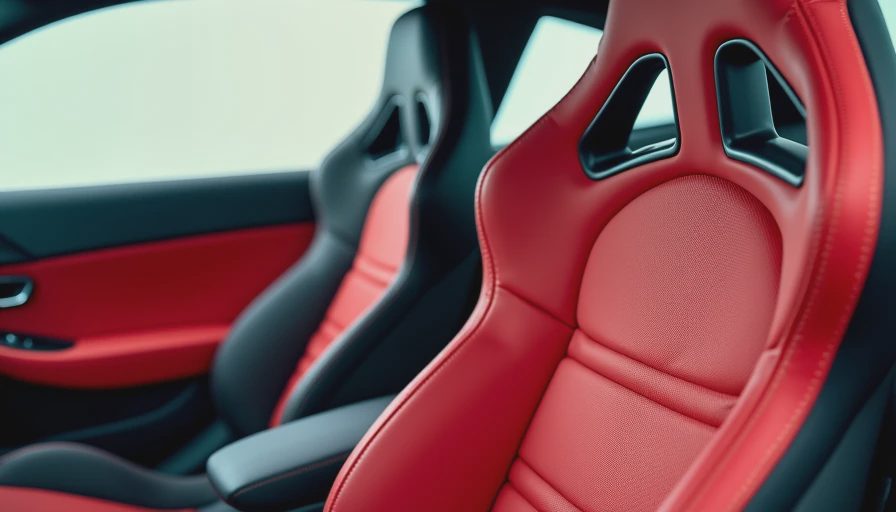
Sparco seats generally fall into three useful categories: fixed-back competition shells, reclining sport seats, and more comfort-focused street performance seats. A fixed shell provides the most consistent lateral support and usually saves weight, but it offers limited adjustment and can be awkward in a car driven every day. A reclining design is easier to live with when the car has rear passengers or when you need to reach a rear-mounted battery, harness bar, or tool bag.
A shell that feels perfect for a ten-lap session can become exhausting during a two-hour highway drive. Measure your shoulder width, hip width, and seated height before ordering. Do not choose by appearance alone. If your shoulders are pressed against the bolsters or your hips shift inside the cushion, the seat is the wrong size regardless of how good it looks in the build photos.
Padding also deserves attention. Thin competition padding gives better feedback through the chassis, while thicker cushions reduce vibration and pressure points. Replacement cushions are available for many models, so a bare shell does not have to remain uncomfortable forever. For most street projects, moderate padding and a reclining back are the sensible starting point.
Fitment is a measurement problem
The most common mistake with Sparco seats is treating the seat as a universal part. The shell may be universal, but the mounting solution is not. You need vehicle-specific side mounts or a floor adapter, sliders if adjustment is required, and hardware that matches the bracket design. The finished position must clear the door, center console, steering wheel, B-pillar, and roof.
Before drilling anything, place the seat and mounts inside the car with the carpet removed if possible. Check the lowest seating position with the seat tilted through its full adjustment range. Confirm that your helmet does not touch the headliner and that your knees still have a comfortable bend when the clutch is fully depressed. A seat that sits too far back can also interfere with harness angles and rear bulkheads.
Use high-quality hardware and follow the seat and bracket manufacturer’s installation instructions. Do not substitute random hardware from a drawer because the bolt appears to fit. A proper installation spreads load through the floor and keeps the seat from shifting during hard braking. After the first drive, recheck every fastener and inspect the floor around the mounting points for flex or distortion.
Harnesses, belts, and airbag wiring
A racing seat does not automatically make a racing restraint system safe. The factory three-point belt is designed around the original seating position and belt geometry. If you remove a factory seat with an integrated belt pretensioner or side airbag, the vehicle may log a restraint-system fault. That light is not cosmetic; it can indicate that part of the supplemental restraint system is disabled.
Harnesses need suitable shoulder angles, an approved harness bar or roll-bar setup where appropriate, and a seat with correct belt openings. Never route shoulder belts around an improvised brace or through openings that are too low. A lap belt should sit across the strong pelvic area, not across the stomach. Some racing harnesses are intended for competition use and are not a simple replacement for a street car’s factory restraint system.
If the vehicle has side airbags, occupancy sensors, or seat-mounted electronics, document every connector before removal. An airbag resistor may silence a warning on some platforms, but that does not restore the original protection. For a dual-purpose build, retaining the factory seat and restraint system can be the cleaner choice.
Street use, inspection, and insurance
Before installing Sparco seats, check your state’s equipment and inspection requirements, especially if you are deleting airbags, changing belt anchors, or adding a roll cage. Rules vary, and a track-only shell may not be acceptable for regular road use. The safest approach is to keep the factory restraint system intact unless the complete replacement has been designed and installed for the vehicle.
Your auto insurer should also know about substantial modifications. A replacement seat can be a small part of a larger build that includes wheels, suspension, engine work, or forced induction. Standard policies may not automatically cover the full value of aftermarket parts after a covered loss. Ask whether the carrier offers custom equipment coverage, stated-value treatment, or a separate policy for a heavily modified or track-oriented car.
Save invoices, installation photographs, model numbers, and receipts for brackets and harnesses. Those records help establish what was installed and what it cost. A $900 seat, $250 mounting system, and $400 restraint upgrade can represent meaningful money even before labor is considered. Never assume the insurer knows about a modification because it is visible in a photo.

A sensible installation sequence
Begin by photographing the original seat, connectors, belt anchor points, and floor mounts. Then disconnect the battery according to the vehicle service procedure and allow the restraint system time to discharge before touching airbag connectors. Remove the factory seat without dragging its rails across painted trim. Keep the original hardware and seat labeled in storage; returning the car to stock later is much easier when every piece is accounted for.
Assemble the new mounts loosely on the workbench, place the seat in the car, and set the driving position before final tightening. Check pedal reach, mirror visibility, shifter clearance, and the ability to turn the wheel without your elbows hitting the bolsters. Torque the fasteners to the manufacturer’s specification rather than guessing. Mark each tightened fastener with a paint pen, then inspect the setup after a short drive and again after several hard stops.
Take your time with the final details. A clean harness opening, protected wiring loom, and correctly positioned slider release make the installation safer and easier to service. If you cannot verify the belt angle or airbag circuit, have a qualified performance shop inspect the work.
What the budget really looks like
The seat itself is only the first line on the invoice. Entry-level reclining models can land around $500 to $900 each, while higher-end fixed shells often cost $900 to $1,500 or more. Vehicle-specific side mounts may add $150 to $300, sliders another $100 to $250, and a harness or compatible restraint system can push the total much higher. Installation labor commonly adds several hundred dollars when wiring, fabrication, or floor reinforcement is involved.
That is why Sparco seats should be planned with the complete cockpit, not purchased as an isolated visual upgrade. A modest setup with one reclining seat, mounts, retained factory belts, and professional airbag diagnosis may be more useful than a cheaper shell that forces unsafe compromises. Buy the part that fits the car and the driving you actually do.
Sparco seats can be an excellent finishing move for a carefully documented build. Measure twice, protect the restraint system, use correct hardware, and record the modification for your insurer. Then post your build. We'll read the whole thing.


No comments yet.