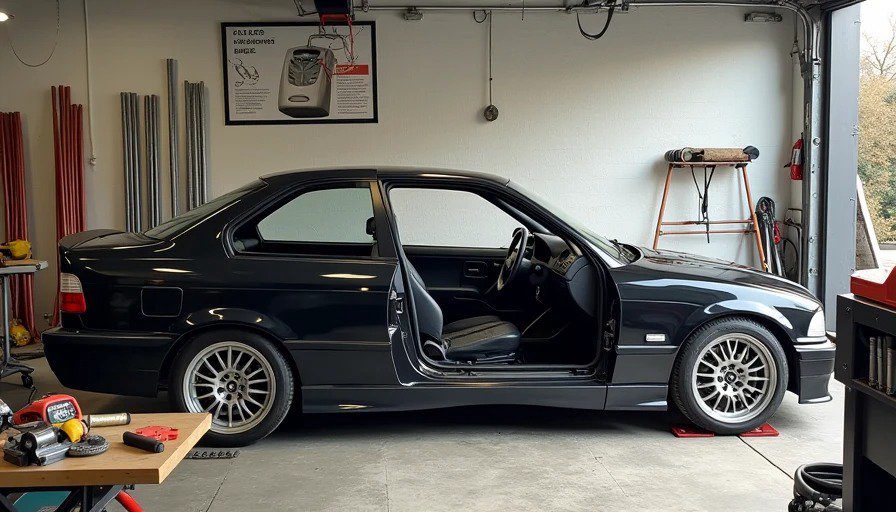
I'm not a professional fabricator. I'm a guy with a 110V MIG welder, a cheap tubing notcher, and a stubborn refusal to pay someone else to do something I could probably figure out. The car is an E36 328i – stripped, caged, and used for HPDE weekends. I wanted a 6‑point roll cage that would pass tech, stiffen the chassis, and – most importantly – keep me alive if things went wrong.
Six months later, I have a finished cage. It's not pretty in every joint, but it's solid, it fits, and it passed inspection. Between the first cut and the final weld, I made every mistake in the book. This is the book.
Part 1: Material – What I Used and Why
The first decision is tubing. You have three main options:
ERW (Electric Resistance Welded): Cheapest, but has a welded seam that can fail under extreme stress. Many sanctioning bodies explicitly disallow ERW for cages due to quality and strength concerns-. Some low‑speed off‑road builds use it, but for a track car? Hard pass.
DOM (Drawn‑Over‑Mandrel): The gold standard for home builders. It's mild steel (usually 1018 or 1020) that's been cold‑drawn over a mandrel, eliminating the internal seam and creating a more consistent wall thickness-. It's strong, welds easily with MIG, and is what the majority of road racing cages are built from-. Most sanctioning bodies require DOM or better-.
Chromoly (4130): Stronger and lighter than DOM, but requires TIG welding and post‑weld heat treatment to maintain its strength-. Not recommended for first‑time builders.
What I used: 1.75″ OD × 0.120″ wall DOM mild steel-. For a car over 2,500 lbs, this is the common spec-. I bought 60 feet of straight tubing – and used every inch, plus some scrap.
What I wish I knew: Buy 20% more than you think you need. You will mess up notches. You will cut a bar too short. You will stare at a piece of tubing that cost $40 and realize it's now scrap. Order extra.
Part 2: Tools – What You Actually Need
You don't need a $5,000 tube bender if you buy a pre‑bent cage kit. I went with a pre‑bent main hoop and A‑pillar bars from a reputable supplier, then fabricated the remaining bars myself. This saved me from buying a bender and learning to bend tubing – which is an entirely separate skill.
Essential tools:
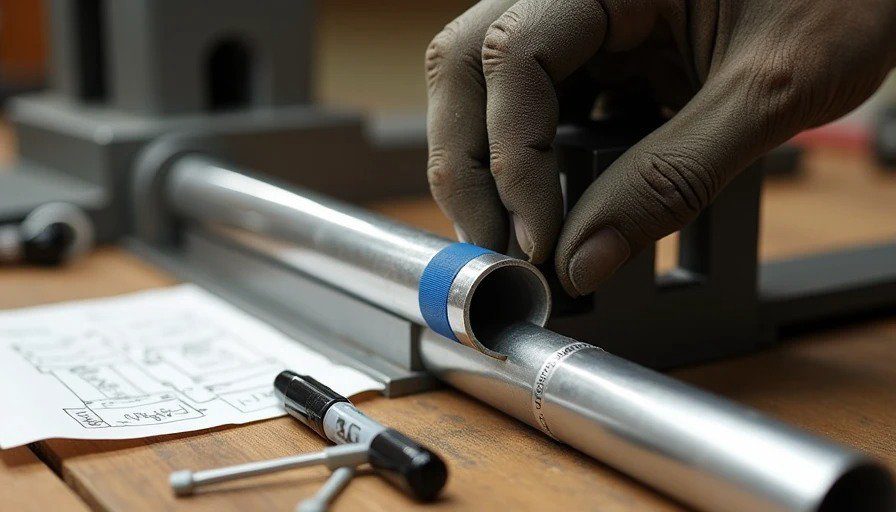
Tubing notcher: I used a hole‑saw style notcher that clamps the tube and uses a drill to cut the cope-. It's slow and requires careful setup, but it works. A notch guide (a jig that helps you line up angles) is worth its weight in gold-.
Angle grinder with cutoff wheels and flap discs: You'll use this constantly – for trimming notches, cleaning welds, and shaping mounting plates.
MIG welder: 220V is ideal, but a good 110V unit with enough duty cycle can work if you're patient. I used a 110V Hobart Handler and it got the job done – but I had to weld in short bursts to avoid tripping the breaker.
Magnetic angle finder and digital level: For setting tube angles accurately.
Clamps: Lots of them. Vise‑grips, C‑clamps, and magnetic welding clamps. You can never have too many.
Plumb bob and string line: For aligning the main hoop and A‑pillar bars relative to the chassis.
What I wish I knew: A tubing notcher is only as good as your setup. If the tube slips even 1/16″ during cutting, the notch will be wrong. I learned to clamp the tube securely and check the fitment after every cut. Also, buy extra hole saws – they dull quickly on DOM.
Part 3: Design and Planning – The Part I Skipped
I was so eager to start cutting that I skipped proper planning. Big mistake.
Before you cut anything:
Strip the interior completely. You need access to the floor, the rocker panels, and the roof structure. Remove the seats, carpet, headliner, and any sound deadening. Clean the areas where mounting plates will go – no paint, no rust, no seam sealer-.
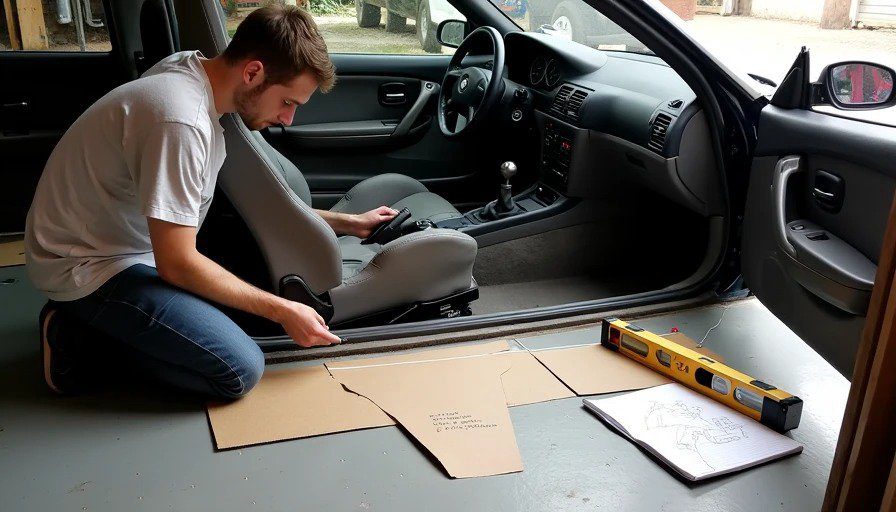
Install the seat and steering wheel first. The cage must fit around you – not the other way around. Get your seating position dialed, then design the cage around it-.
Plan the main hoop position. The main hoop should sit as far back as possible while still allowing the seat to recline. It should be vertical or slightly angled rearward. Use a plumb bob to mark the floor directly under the hoop's intended position.
Check for body clearance. The main hoop and door bars must clear the body – if the cage is wider than the body, you'll have issues with door fitment and panel clearance-.
Decide on mounting points. Most cages use 6″×6″ steel plates welded to the floor, with the tube welded to the plate-. The plates should be at least 1/8″ thick (0.125″) and formed to match the contour of the floor-. I used cardboard to make templates before cutting steel-.
What I wish I knew: The chassis flexes. If you weld the cage with the car on jack stands, the cage may not fit properly when the car is on its wheels. One builder recommended placing a jack in the middle of the car and lifting it until the doors align – that becomes your "zero" point for cage installation-. I didn't do this, and my door gaps changed slightly after the cage was welded. Learn from my mistake.
Part 4: Notching – The Art of the Cope
Notching is where 80% of the time goes. Every joint between two tubes requires a precise cope (the curved cut that allows one tube to fit flush against another).
Methods I tried:
Hole‑saw notcher: The most common method. You set the tube at the correct angle, clamp it, and use a hole saw to cut the cope-. It works, but it's slow and the hole saws wear out quickly on DOM.
Chop saw method: For simple angles, you can set the chop saw vise at an angle and cut the tube, flip it, and cut again-. This is faster but less precise for compound angles.
Angle grinder freehand: For fine adjustments, I used a cutoff wheel and flap disc to tweak notches that were slightly off-. This is where skill matters – and where I improved the most over six months.
The key to good notching:
Test fit every joint. Don't assume a notch is correct until you've fitted the tube against its mating surface. Use scrap tubing to test your notch setup before cutting the actual tube-.
Mark the tube clearly. Use a sharpie to mark the rotation and angle of each notch. I used paper templates wrapped around the tube to mark the start and end of each cope-.
Leave extra length. Cut tubes slightly longer than needed, then trim them down as you fit. It's easier to remove material than to add it.
What I wish I knew: A perfect notch is one where the gap between the two tubes is less than 1/16″. Gaps cause weak welds and excessive distortion-. I spent hours grinding notches to get them tight – and it was worth every minute.
Part 5: Welding – Order Matters More Than You Think
Welding a cage isn't just about laying down a good bead. It's about controlling distortion. Heat causes metal to expand and contract, and if you weld in the wrong order, the cage will pull the chassis out of square-.
My welding process (after much trial and error):
Tack everything first. Every joint gets a small tack weld before any full welds are laid down. This holds the cage in position and prevents movement during welding-.
Weld in a staggered pattern. Don't weld one joint completely, then move to the next. Instead, weld a small section on one joint, then skip to another joint, then another. This spreads the heat and minimizes distortion-.
Weld the main hoop to the mounting plates last. The main hoop is the backbone of the cage. Weld all the other bars first, then weld the main hoop to the floor plates. This allows the cage to "settle" into position before the final attachment.
Keep gaps tight. The fit‑up between tubes should be as tight as possible – no gaps. Gaps not only weaken the weld but also increase distortion as the weld metal cools and contracts-.
Use the right settings. For 0.120″ wall DOM, I used 0.030″ wire, 75/25 Ar/CO2 gas, and about 18‑19 volts. The weld should have good penetration without excessive spatter.
What I wish I knew: Overhead welding is a pain – and a lot of cage joints are overhead. Practice overhead welds on scrap before you start on the cage. And if you can, remove the roof or windshield to get better access-. I didn't, and I paid for it with awkward positions and less‑than‑perfect welds.
Part 6: The Three Mistakes That Cost Me Weeks
Mistake 1 – The main hoop was 1/2″ too wide.
I measured the interior width at the floor, but the body tapers as it goes up. The main hoop fit at the floor but was too wide at the roof – it hit the headliner and door seals. I had to cut the hoop, shorten it, and re‑weld it. This weakened the structure and required additional gusseting.
What I should have done: Measure the width at multiple heights – floor, shoulder, and roof. The hoop needs to clear the body at all points.
Mistake 2 – I welded a bar in backwards.
The diagonal bar in the main hoop has a specific orientation – it should brace the hoop against forward and rearward loads. I welded it in backwards (the wrong angle), which created a "dead load path" where the bar dead‑ended into another bar without proper triangulation-. I had to cut it out and re‑weld it.
What I should have done: Study cage design principles before welding. The rule is: every tube should end at a node (a junction of two or more tubes), never at a point on a tube where it can simply bend the other tube-.
Mistake 3 – I didn't plan for the harness mounting.
The shoulder harnesses need to mount to a horizontal bar behind the seat, at the correct height (shoulder level or slightly below). I forgot to add this bar before welding the main hoop in place. I had to add it later – which meant welding in a tight space with limited access.
What I should have done: Plan every attachment point – harness mounts, seat mounts, fire extinguisher bracket – before welding the main structure.
Part 7: The Finished Cage – What I Got Right
Despite the mistakes, the cage is solid. It passed tech inspection, the chassis feels noticeably stiffer, and I have far more confidence on track.
What I got right:
DOM tubing throughout. No shortcuts on material.
Proper mounting plates. 6″×6″ × 1/8″ plates, formed to the floor contour, welded to the chassis.
Triangulation. The main hoop has a diagonal, the rear stays have a cross‑brace, and the door bars have a diagonal.
Good penetration. Every weld was ground and inspected. No cold laps, no porosity.
Part 8: What I'd Do Differently (The Short List)
Buy a pre‑bent kit with all the bars. I bought just the main hoop and A‑pillar bars and fabricated the rest. Next time, I'd buy a complete kit with notched ends – it would have saved months.
Rent or borrow a TIG welder. MIG works, but TIG produces cleaner, stronger welds and less spatter-. For a cage that's meant to save your life, the extra effort is worth it.
Weld the cage with the car on its wheels. Jack stands change the chassis geometry. Next time, I'll set the car on its wheels (or at least on cribbing) before final welding.
Practice notching on scrap for a full weekend. Notching is a skill, and I learned it on expensive DOM tubing. I should have burned through $50 of scrap before touching the real material.
Get a second opinion. I should have had an experienced fabricator look at my fit‑up and welding before I committed. A fresh pair of eyes would have caught the backward diagonal before I welded it.
Building a roll cage in a home garage is absolutely possible – but it's not a weekend project. It's a six‑month project that will test your patience, your welding skills, and your ability to admit when you've made a mistake. The cage I built isn't perfect, but it's mine, and I trust it.
If you're considering this project, my advice is simple: plan more than you think you need, buy extra tubing, and expect to make mistakes. The first cage you build will teach you more than any forum post ever could. Just make sure your mistakes are on the bench – not on the track.


No comments yet.